#sketch export html
Explore tagged Tumblr posts
Visit Tumblr Blog
Explore Tumblr blogs with no restrictions, modern design and the best experience.
Last Seen Tumblr Blogs


Fun Fact
Tumblr was named as a finalist in Lead411’s New York City Hot 125 in Aug 2010.
Note
how did you get started making music, tools-wise?
I've talked about this a bit before and I don't necessarily recommend doing this, so skip the following two paragraphs and go right to the one under the break if you actually want the method I recommend
I lied to a girl I liked from my school and told her that, because I could play guitar I could also play piano, so I could teach her to play piano. both of these statements were lies.
I had to panic and learn both guitar and piano one week ahead of the lessons I was giving her as an excuse to hang out. so I self-taught in a haze of panic and "maybe she'll like me" (she did not) (but she kind of did) (but she was bicurious) (but she was wishy-washy on if she wanted to get together and her parents didn't like me) (and her parents were homophobic) (I think she might have texted me at one point years down the line to tell me she had a girlfriend but it was after I deleted our text history and I'm chronically unable to remember to put people's names into my contacts so who knows)
but that's all an aside. that's a bad method.
anyway if you want to start making music in earnest, doing what I did when I got serious about making songs instead of trying to impress girls whose parents wanted to destroy me with their minds here's a better answer
go acquire FL Studio. it's apparently really easy to do this because people have been acquiring it for years, or so I've heard. FL is good for learning because you've got 20 years worth of free tutorials available to you on youtube to dig through and plenty of stock vsts to play with out of the box
FL Studio is, realistically, the only tool you actually need to start making music. you could get away with less, but it's what I used, and as long as you don't pick up Specific Bad Habits, your experience with it will transfer to other DAWs if you decide to switch it later
that's all, really
if you go this route, the golden rule I'm going to impart on you right now is that you need to have a limiter on your songs. the default FL studio song templates have one, so you should keep it until you know enough to know why you might adjust something like that
it doesn't matter if it sounds fine in the editor without a limiter. everyone thinks it's not a big deal at the time, but as you get more experienced, there's literally nothing short of getting in legal trouble that you'll regret more than realising that your old work is almost entirely unsalvageable because you didn't put a limiter on it and now half of the audio is just lost data to clipping
I'm gonna put a few more recommendations for things I've used, just so you can consider them if you need something else to chew on. everything past this point is entirely optional and you'll do just fine with FL Studio alone. in fact, probably don't worry about everything below the line
-=-
items marked with [F] are free.
DIGITAL AUDIO WORKSTATIONS THAT AREN'T FL
for tracker-based editing and chiptunes, use Renoise. you'll either love or hate trackers, and while they have a steeper learning curve than piano roll DAWs, they might come more naturally to you. I personally think that Renoise is a lot of fun to use. it kinda has an "addictive" quality to it, as funny as that is to say
for quickly sketching songs, use [F]Jummbox. it's an html workstation (multiplatform!) that writes your sketches to a url, meaning it's pretty easy to collaborate on musical sketches. Jummbox is good for making chiptune style instrumentals, but what makes it especially accessible is the fact that it works on a piano roll system, which will be familiar to you if you're working in FL
for writing sheet music, I recommend starting with [F]Musescore. I'll warn you right now that there aren't really any good notation editors and you're making lesser-of-evils decisions when you pick any of them, but it's probably the best compromise out there right now. it's the one I use when I need to hand something to a physical musician. you can also export pieces as midi, although there's better ways to do that lol
-
VSTs
if you can acquire Pianoteq, do that. if you feel uncomfortable with acquiring it, [F]Keyzone Classic is free and can sound pretty nice with a bit of work, but you really have to learn to work with it
if your workstation can handle it performance-wise, go pick up [F]Vital - Spectral Warping Wavetable Synth. there's tons of free presets for this out there and it sounds good. cool synth. Serum: Advanced Wavetable Synthesizer is also good and has plenty of presets, but it's on the pricy side, so consider how comfortable you are with [finding a friend to buy it for you]
[F]Decent Sampler doesn't do much out of the box, because it's just a tool for playing sample banks, but if you go to [F]Pianobook, you can find tons of weird and fun sample packs of just about everything you can imagine. sounds derived from folk instruments, industrial equipment, lego sets, stylophones, choirs, whatever. incredibly useful.
Valhalla VintageVerb. this is the reverb plugin. you want this one. [F]Valhalla Super Massive is also good but it's more focused on alien-sounding reverb effects and enormous spaces, so it's kind of got a niche use case and you should be a little careful with it
if you've heard a lo-fi hip hop song on youtube, it probably used [F]iZotope Vinyl. this one can save you a lot of time if you're going for that sound because it comes with all the little vinyl flourishes outside of compression (like dust crackling) that you'd otherwise have to add yourself
[F]Genny VST is advertised as giving a genesis/megadrive sound, but what actually makes it shine is that it's an actual synth emulating the YM2612 and SN76489 sound chips. this means you can create your own sounds that work within those specs, which is a lot of fun! definitely beats just using samples, if you ask me
-
HARSH VSTS THAT I PERSONALLY LIKE BUT WHICH ALSO MIGHT !!HURT!! YOU. SO BE VERY CAREFUL USING THESE.
[F]Tritik Krush is a bitcrushing plugin. it does a good job of bitcrushing and downsampling. I use it a lot in my songs, but you've really gotta know how to keep this one under control, because it's fully capable of making painful sounds on accident and can completely devour your mix
[F]FSA Latcher is a gorgeous noisebox. it screams in horrible ways and makes dying machine noises in various colours. this is the musical equivalent of working with radioactive material, so be extremely careful using this in anything you don't want to hurt the listener's ears
girlfriend just told me I have to recommend [F]Noise Engineering Ruina to you if I'm making a category with this heading. I don't personally use it, but she likes it (she's better at music than I am) and it's free, so you should go pick it up. "it annihilates sounds very deliciously" (maybe I should use it)
-
hope that helps a bit!
189 notes
·
View notes
Text
today in questionable development decisions,
i have finished a site entirely* in godot, and it's now live right where my questionable web decisions have always been!
(*it's still hosted via JS bc apparently there's some really jank shit going on with godot 4 html exports and i am too attached to the features to backport it all to 3 (i tried))
anyway! this is the product probably a year of overthinking > cutting the scope down > overthinking again loop, as well as how i finally got out of creative block, so i'm pretty darn happy with it even with the bugs (like how it doesn't like to resize and i currently dunno how to send keyboard shortcuts like f5 and f12 to the browser when focused on the game area)
might still end up porting it over to JS if maintaining it becomes problematic, since i believe currently there's a file size issue specifically with the shared array buffer in firefox, my beloved browser, and if it can't work in that then what's the point?
either way, i kinda despise prototyping that goes from a sketch or static graphic straight to code, so even if i do jump right to JS for future builds (which is conveniently very easy since i am using the same node based implementation from before), i know exactly what i'm happy with and only need to make it work in JS.
#web dev#arguably#feel free to reblog telling me how the page wont resize or any other number of bugs that a website should expect to not have in current yea#i really hope godot does improve their web deploy capabilities in 4 bc i do love the program#is just a royal pain to get live in its current state and the fixes might not hold#which is why i'm looking at JS again right after getting this to work#but oh well at least i had fun
4 notes
·
View notes
Text
Angora (software toybox dev 2024-09.2)

LibreVast Ideadump
(first do with minimal narrative, no multiplayer and fewest stats so no RPG, no VN, no MMO... yet)
Learn my way into "Level Design" with TTRPG addventure modules and video game-design AnarchyArcade, Valve games...
Turn-based 2D top-down exploration addventure (C#/F#/GDScript) and then progress it towards a first person puzzler experience
PuzzleTree + LDtk (2D Gridmap) -> Codex Level Builder (early 3D Gridmap) -> Doom BinarySpacePartitioning with Spatial-Hashing & Verlet-Integration -> FuncGodot & Juicy FPC (UE5 Nanite + Red Eclipse-like?)
Educational & Edutainment game dev akin to Zachtronics
RealTimeStrategy? (Starcraft2-like)
TurnBasedStrategy? (FreeCiv-like)
TurnBasedTactics? (XCOM-like)
Overworld + Shopping Mall Gridder? (DungeonMaster?)
Roguelike? (RougeTide)
FirstPersonController Puzzler? (Frames-like)
ShootThemUp? (Cooperative)
KartRacing? (top-down Arcade Racing)
Starnest/Starvast as StatRaiser? (Videotome Heartbreak?)
Art RPG / VirtualPetSite?
Raycaster -> Raymarching?
SVG MazeWars?
Solo adventuring...
Party-based CRPG?
MultiUserDomain?
LegendOfZelduh1?
Metroidvania?
MiniRadarGame?
InfrastructureBuildingSystems
Ecosystem Simulationism
Persistent Ecosystems (Logistics, Bases, Factions, Agency)
Procedural and Handmade Quests
Emergent Behaviors
Open-er Exploration
Alternative routes & sidetrack puzzle tasks
Checklists hiding option
No grind (minimal mechanical labor)
Few final end-states & making losing fun
Collectibles & inventory tracking in orthogonal and restrained manners
Female likable main characters
Studying Europa Universalis 4
Studying Civilization 5 CE Maskoch-modpack
Studying Tyranny
Studying OpenTTD
Studying (Ironwail + Trenchbroom) Quake 1
Studying Doom
Studying Ken Sivlerman and their corpus (Duke Nukem 3D, BUILD2...)
Studying Raycasting (Wolfenstein 3D)
Studying Gridders (Maze Wars & Dungeon Master)
Studying Wizardry & Ultima 1-3
Studying Cyberpunk RED
Studying NOVAverse
Studying d20System (mostly Pathfinder 2E & D&D 3.5)
Studying GURPS corpus
Studying Paradise
Studying iXe
Studying Tarot, Dice & other procedural generators
Daggerfall Modding?
Transformation-based game, module or quest
Custom data-banking system
Infinite rich HTML virtualized canvas?
Chunk World-wrapping methods (X-wrap?)
Phonebook System
Boids & Statistical / procedural crowds agentive System (Monte Carlo-based?)
Economy System
Job / Career System
Factions System
Multilingual System
Skill Trees
Virtual Snapshot-ting Realmscapes + with SourceLevelVersionControlSystems
Chunk loading, unloading, saving and exporting
Vector-based territorial domains management (estate infrastructure and automation games)
TextParserAddventure? (Zork+AMFV?)
HypermediaAddventureStorytelling (Addventure?)
Narrative RPG?
MassivelyMultiplayerOnline World?
Retro Usbourne 8-bit CRPG FreeBASIC implementation
Trial Engine (MultiAgent SocialLifeSim Systems?)
QGIS+OSM+Planetile for Angora worldbuilding
Unity game demos with MegaOCEAN + ExtendedZodiac NPC Agents (Love/Hate pkg), Political intrigues (Quest Machine pkg), Multilingual?
Turing Complete Modding Suite
Complete Character Sheet Party/Batch Customization Suite (AgentBankGen)
Customizable theme pack (KDE Plasma) as responsive UI/UX design system
Paper sketch batches to modular SVG sheets
0 notes
Text
From Pixel to Perfection: Mastering the Art of PSD to WordPress | Xchop
Introduction to PSD to WordPress Conversion
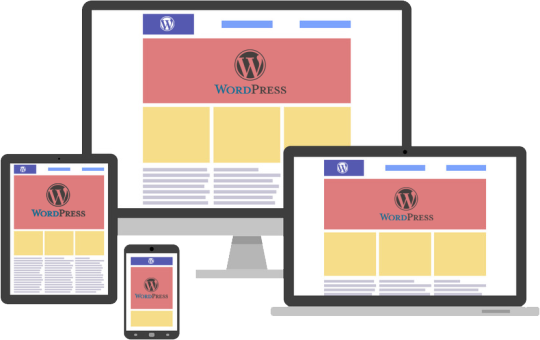
In today's digital age, having a strong online presence is essential for businesses and individuals alike. One of the most popular and powerful platforms for creating and managing websites is WordPress. With its user-friendly interface and extensive customization options, WordPress has become the go-to choice for website development. However, if you have a unique design for your website created in Photoshop (PSD) format, you need to convert it into a WordPress theme. This process is known as PSD to WordPress conversion, and it allows you to bring your design to life on the web. In this article, we will guide you through the steps involved in mastering the art of PSD to WordPress conversion.
Understanding the Benefits of Converting PSD to WordPress
Before diving into the technicalities of PSD to WordPress conversion, it's important to understand why it is a beneficial approach. Converting your PSD design to WordPress offers several advantages. Firstly, it provides you with a responsive and mobile-friendly website. With the increasing use of smartphones and tablets, having a website that adapts to different screen sizes is crucial. WordPress themes are designed to be responsive, ensuring that your website looks great on any device.
Secondly, converting PSD to WordPress allows for easy content management. With the intuitive WordPress dashboard, you can easily update and modify your website's content without any coding knowledge. This flexibility empowers you to keep your website up-to-date with fresh content, resulting in better user engagement and search engine rankings.
Step-by-Step Guide to Converting PSD to WordPress
Now that we understand the benefits, let's dive into the step-by-step process of converting PSD to WordPress. The first step is to slice your PSD design into individual image assets. This involves separating different elements like the header, footer, menus, and content sections. Once you have the images ready, you need to convert them into HTML and CSS code. This step involves coding the structure, layout, and styling of your website using web technologies like HTML, CSS, and JavaScript.
Next, you need to integrate the HTML and CSS code into a WordPress theme. This is done by converting the static HTML and CSS files into a dynamic WordPress theme structure. You will need to create PHP template files and add WordPress-specific tags and functions to make your theme compatible with WordPress.
Choosing the Right Tools and Resources for PSD to WordPress Conversion
To ensure a smooth and efficient PSD to WordPress conversion process, it is important to choose the right tools and resources. There are several tools available that can simplify the conversion process. For slicing the PSD design, you can use tools like Adobe Photoshop or Sketch. These tools allow you to export individual image assets from your design.
For coding the HTML and CSS, you can use popular text editors like Sublime Text or Visual Studio Code. These editors provide syntax highlighting, auto-completion, and other features to streamline your coding workflow. Additionally, there are online resources and tutorials available that can help you learn and understand the intricacies of PSD to WordPress conversion.
Customizing the WordPress Theme with Elementor
Once you have converted your PSD design into a WordPress theme, you can further enhance the customization options using popular page builders like Elementor. Elementor is a powerful drag-and-drop page builder that allows you to visually design your website without any coding knowledge. With its extensive library of pre-designed templates and elements, you can easily create stunning and unique layouts for your website. Elementor also offers advanced features like animation effects, responsive editing, and WooCommerce integration, making it a versatile tool for customizing your WordPress theme.
Enhancing Your WordPress Website with Divi Theme
Another popular option for customizing your WordPress theme is the Divi theme. Divi is a multipurpose WordPress theme that comes with a built-in visual page builder. With its intuitive interface and extensive customization options, Divi allows you to create stunning and professional websites. It offers a wide range of pre-designed templates, layout options, and modules that can be easily customized to match your design requirements. Divi also provides advanced features like split testing, global elements, and responsive editing, making it a powerful tool for enhancing your WordPress website.
Creating a Custom WordPress Theme from Scratch
While using pre-designed themes and page builders can be convenient, sometimes you may need a completely custom WordPress theme to meet your unique design requirements. In such cases, you can create a custom WordPress theme from scratch. This involves creating the necessary PHP files, adding the required WordPress tags and functions, and styling the theme using CSS. Although creating a custom WordPress theme requires advanced coding skills, it offers complete control over your website's design and functionality.
Utilizing WordPress with Advanced Custom Fields (ACF)
Another way to enhance your WordPress website is by using the Advanced Custom Fields (ACF) plugin. ACF allows you to add custom fields to your WordPress posts, pages, and custom post types. This gives you the flexibility to create custom content types and add additional data to your website. For example, you can add fields for testimonials, portfolios, or product specifications. ACF also provides an intuitive interface for managing and displaying the custom fields, making it a powerful tool for extending the functionality of your WordPress website.
Converting a Custom Design into a WordPress Website
In addition to converting PSD designs, you can also convert custom designs created in other design tools like Adobe XD or Sketch into a WordPress website. The process is similar to PSD to WordPress conversion, where you need to slice the design into individual assets and convert them into HTML and CSS code. Once you have the code ready, you can integrate it into a WordPress theme following the same steps mentioned earlier. This allows you to bring your custom design to life on the WordPress platform and take advantage of its powerful features and functionality.
Converting a Figma Design to WordPress
Figma is another popular design tool that allows you to create stunning web and mobile designs. If you have a design created in Figma and want to convert it into a WordPress website, the process is similar to converting PSD or custom designs. You need to export the design assets from Figma and convert them into HTML and CSS code. Once you have the code ready, you can integrate it into a WordPress theme and customize it further using WordPress plugins and page builders.
Best Practices for Successful PSD to WordPress Conversion
To ensure a successful PSD to WordPress conversion, it is important to follow best practices. Firstly, optimize your images for web by compressing them without compromising quality. This will ensure faster loading times for your website. Secondly, make your theme lightweight by removing unnecessary code and scripts. This will improve the performance and speed of your website. Thirdly, test your website on different devices and browsers to ensure compatibility and responsiveness. Finally, regularly update your WordPress theme, plugins, and core files to keep your website secure and up-to-date.
Conclusion
Mastering the art of PSD to WordPress conversion opens up a world of possibilities for creating stunning and functional websites. Whether you are a beginner or an experienced developer, the step-by-step guide provided in this article will help you navigate the complex process with ease. By understanding the benefits, choosing the right tools, and following best practices, you can convert your unique designs into fully functional WordPress websites. And if you need professional assistance, Xchop is a leading PSD to WordPress conversion service provider that can deliver high-quality custom WordPress themes tailored to your specifications. Don't miss out on the opportunities that PSD to WordPress conversion offers. Start converting your designs from pixel to perfection today!
More Info: https://www.xhtmlchop.com/
#wordpress#wordpressdesign#psd to wordpress#webdesign#figma to html#divitheme#ACF#wordpress elementor#webdevelopment#bootstrap#wordpress acf#web#website#xchop
0 notes
Text
Best AI Graphic Design Tools
AI graphic design tools are revolutionizing the way artists and designers express their creativity, helping them become more efficient in less time. Some of amazing tools are:
Uizard – Digitizes hand drawn ideas into digital files, allowing app developers and designers to work faster. It speeds up prototyping process while keeping the personification of hand-drawn designs. Notable features: Transform sketches into digital UI designs, speeding up the prototyping process, and offer designs in multiple formats toe export.
Designs.ai – an AI-assisted design toolkit. Their main feature is the machine learning abilities which studies your likes and offers tailored design solutions. It “ensures an efficient and personalized design journey”
Adobe Sensei – Uses Generative AI and machine learning to automate tasks and provide innovative design solutions. It is embedded in the Adobe Suite and has become a substantial tool for professional graphic designers and creatives.
Fronty – Simplifies the web design process by turning image designs into code. It generates custom HTML, CSS, and React code. It accelerates the web development process.
AutoDraw – (created by Google) Converts rough sketches into refined and polished illustrations. Its machine learning predicts what you’re trying to draw and it presents you with polished sketches to choose from.
Khroma – AI color tool that based on your aesthetic, Khroma provides you with personalized color palettes and helps designers be consistent with their work.
Let’s Enhance – Improves quality of images without losing details. It can enlarge low-resolution images and restore the quality of old pictures. Takes pixelated images and adds detail to provide a high-res image and ideal to print.
Read the article to learn more!
0 notes
Text
PSD TO HTML Website Designing Company in Delhi - 9599292010
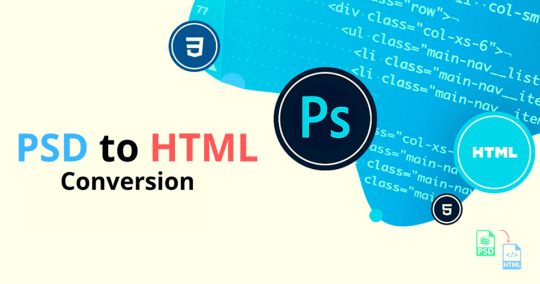
What is PSD to HTML
In our lucid HTML conversion process, we treat every design format equally, whether it is Sketch, PSD, PDF, Adobe XD, PNG, JPG, AI, EPS or any similar preference. We have fervent team, which is following effective coding standards to get same naming convention for every use and hence you can meets the expectations of the customers at par. We input custom form elements plus WCAG 2.0 for web accessibility to create a fresh design that speaks out.
How PSD TO HTML Website Designing Company do this?
Firstly what you have to do? Just Design a high fidelity pixel-perfect mockup in Photoshop of exactly what you want your site to look like.
Then you can easily Use the slice tool to divide your website's imagery and then export it for the web.
Write HTML and CSS that utilizes the imagery you exported from Photoshop.
Benefits from PSD TO HTML Website Designing Company?
You will get 100% guaranteed satisfaction
You will surely get extremely fast service
Cross-browser compatibility
W3C validated
Includes up to 5 pages
PSD TO HTML Website Designing Company in Delhi | PSD TO HTML Website Designing Company in Noida | PSD TO HTML Website Designing
#PSD TO HTML Website Designing Company in Delhi#PSD TO HTML Website Designing Company in Noida#PSD TO HTML Website Designing Company#PSD TO HTML
0 notes
Photo

How to Export Sketch to HTML ☞ https://medium.com/sketch-app-sources/how-to-export-sketch-to-html-65c427b3aa3a #html5 #css3
1 note
·
View note
Text
Best free notepad mobile app

The latest app update brings an archive feature that lets you hide notes you no longer need however, deleting them is not an option.
The note-taking app supports Apple Workflow, where workflows can be created according to your needs.
Bear Notes can be exported in various formats, including Text, MD, PDF, HTML, RTF, DOCX, and JPEG.
Easily but efficiently set up hashtags to create categories and search for notes.
The synchronization function is not available in the free version of the app. If you want your notes to sync between your iPhone, iPad, and MacBook, you need to purchase an app for it. Plus, Markdown’s support makes it a favorite among regular writers and a perfect alternative to Evernote.īear is currently only available for the iOS platform. This combination of intuitive design and ease of performing USP tasks is an application. The portable bear app for iOS has amazed most users with its tri-panel design, allowing users to perform various tasks efficiently. Marked as the best Apple iOS app for 2016, the app performs all the functions, such as capturing notes as text, images, videos, and sketches that you would expect from a shooting app. It was launched in 2016, and in no time, the app has been heavily featured on the list of best-noting apps for iOS devices. Bear: the best note-taking app with an intelligent interfaceīear is the only noting app on the iOS platform that seriously competes with Evernote and the original iOS noting app. You will be charged $7.99 for your monthly subscription and $69.99 for your annual subscription to Evernote Premium. In the premium version of the app, you can sync with an unlimited number of devices and get 10 GB of download space per month. Although the free version gives you the option to sync between two devices and 60MB of downloads in a month.
You have the option to add a reminder to your notes, and when the time comes, your saved note will be pinned to the top.Įvernote has a free version and a premium version.
The desktop function allows you to share your notes with your colleagues and friends.
You can quickly switch from a personal account to a premium account without logging out of the app.

The Evernote app lets you sort and searches for notes using bookmarks.Your notes will automatically sync across various platforms, including Android, iOS, Mac, Blackberry, and Windows. If you have devices running other operating systems, you can use this app to run a note on one device and continue it on another device. In terms of syncing notes across different operating systems and devices, there’s no comparison for Evernote. The iOS app comes with a built-in business card and document scanner so you can scan your documents and store them neatly. You can save in various formats, such as text, videos, images, audio, web clips, PDFs, hand-drawn sketches, etc. With the creation of the laptop, the developers successfully tried to bring it closer to reality. The app offers perfect noting on iPhone, whether you want to jot down random ideas, create a checklist and to-do list.
One of the most outstanding features of Evernote is its cross-platform support. Evernote: the best cross-platform note-taking appĮvernote, one of the oldest and most sophisticated note-taking apps for iOS, launched in 2013 when such apps were scarce.
Final Words on the Best Note Apps for iOS.
Simplenote: a minimalist and straightforward noting application Pages: Apple’s alternative to Microsoft Word Dropbox Paper – the best note-taking app for official notes Zoho Notepad – the best notes app for visual thinkers Google Keep: a lightweight note-taking app Bear: the best note-taking app with an intelligent interface Evernote: the best cross-platform note-taking app
1 note
·
View note
Text
Adobe xd download html embed

#Adobe xd download html embed code
#Adobe xd download html embed professional
Selecting a region changes the language and/or content on.
#Adobe xd download html embed code
You can find all of these solutions in the XD plugin panel and I would highly encourage you to spend a few minutes with each and output your designs to code to see if the final output meets your publishing needs. I hope you found this article useful in choosing the best solution for exporting Adobe XD to HTML and CSS designs. You will still need to alter this code to embed things like forms, videos, or make better use of CSS classes. Going from setup to export is quite simple although there is a limit to what functionality you can integrate within the plugin. If you’re more familiar with HTML and CSS and want to customize the CSS to fit into existing solutions or you just want to take the code output further, Web Export is a great solution but it will take more time to set the site up correctly.įireblade would be my choice if you need support for other languages in addition to HTML and CSS. This works the same for all Anima plugins in Sketch, Adobe XD, or Figma: Decide and select where you want to Embed Code: in a Layer, an Artboard, or Project. The publish features within Anima make it easy to host and publish your website right within your Anima account.
#Adobe xd download html embed professional
It’s very simple and can output very professional looking websites fast. All of these plugins can be a great option if you want to quickly generate landing pages or smaller informational websites with little functionality, but if you’re working on a project that needs to scale I would recommend talking to a developer about the platform requirements before selecting your solution.įor simple responsive websites that serve to share business information while utilizing features like a contact form, video embeds, and more Anima would be my plugin of choice. The question you want to ask yourself is “What is the end goal of my site?”. As you can see, there are unique advantages to each of these plugins.
0 notes
Text
me trying to make a gif part 2 (thrilling finale, buildup ver.)
ok good news and bad news: good news being withheld for Spoilers (not that it’s that hard to guess anyway lol), bad news explained first bc, chronologically, it is first
so yesterday i mentioned in the tags of that post that i had seen that krita has an animation feature so i was gonna try importing the frames into that and then exporting it as a gif. easier said than done, as it turns out
i started by opening the file i made yesterday with 62 layers as the frames and importing that into krita, which worked fine (i didn’t know you could actually open .psd files in clip stuido ((this typo is so fucking stupid it made me laugh so im leaving it)) and krita, so that’s pretty neat, i wonder if it works the other way around too) but i ran into problems when i tried to convert those layers into frames in an animation. because, like, the layout of the program has the layers displayed in one tab, and the animation timeline in another, like so:
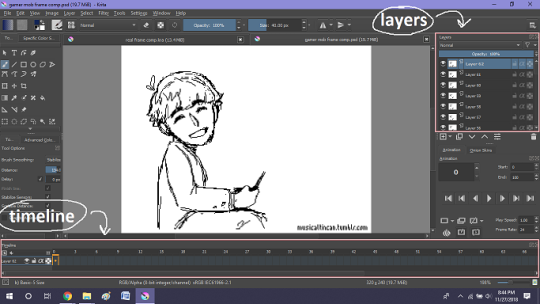
(do u like how im using pictures now, i thought of that yesterday after i published the other post and realized hey, visual reference would probably make my plight a lot easier to understand!! so enjoy these educational diagrams from now on)
so my goal was to get the frames from the layers into the timeline, and i still don’t know if i did it right bc lbr krita is not very intuitive at all,,.,, i mean i watched a video tutorial abt how to animate in krita which was v helpful (it’s the one by jesse j james on yt fuckin SHout out) but it was about animating from scratch, not importing an animation you’ve already done elsewhere
so like, the way krita’s animation thing works, from what i could piece together as i bumbled my way around w/ it, is that each layer in the layers tab is a separate timeline in the,,, timeline tab
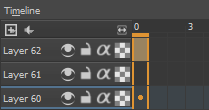
i want them all to be in the same timeline, not separate ones, and there’s no way to combine them in the timeline tab bc doing that just overwrites whatever layer you’re pasting it down onto, and also if you define the number of frames for that timeline (62 for this project) it just puts the single image of that layer for all of the frames instead of just one of them, so you’d have to go through and delete all the other frames you don’t want it to be, which would be such a fuckin pain
so i found a workaround, which is so tedious that it can’t be the right way to do it, but basically i started w/ layer 1 and defined 62 frames & then emptied frames 2-62, like this

(that blue box is the frame, btw, even tho it says 0, which actually kind of annoys me like why doesn’t it start the first frame on 1????)
from there i went up to layer two and selected that in the timeline, but for some reason the frame doesn’t show up automatically?

& i couldnt fuckin figure out how to make it into like, an Official Timeline Layer or whatever tf bc like, u see on layer 1 how theres that little lightbulb-looking icon on the right? that’s for turning on onion skin which only applies when you actually have frames with things drawn on them, so basically layer 2 in the layers tab has a drawing but in the timeline it doesn’t?
i didn’t find out what the actual reason for this is or how you’re /supposed/ to make the frame appear in the timeline, but what i did was right click on layer 2′s timeline & select “create blank frame” which magically made the frame i want appear

but it’s on top of the layer 1 frame, and i want it to be the frame after. also it’s still in a different timeline. this is the only easy fix in this whole damn process, u can literally just click & drag the frame from layer 2 to layer 1 and put it wherever u want on the timeline

and then u just delete layer 2 and that’s it, frame transferred!! then i just had to do that for 60 more layers and after [unspecified amount of time but it was a fuckin while ok] my timeline looked like this!

(the gaps near the end are held frames, to save me time so i didn’t have to copy a bunch of frames that were exactly the same)
krita is great because as far as i know ur animation can have an unlimited number of frames, at the risk of your own pc’s processing power, which is a definite upside to SOME expensive art programs i know (clip studio, i’m talking abt csp) and u can pick the frame rate too (cough photoshop elements 5.0 even tho u dont technically have an animation feature & it’s a miracle u can even make gifs at all) so once i finally got all the frames situated all nice and in order like on the same timeline, playing it was great! played at the right speed, looped perfectly, it was a dream come true right
well, time to export it as a gif
ha
haha
hoooo oo o
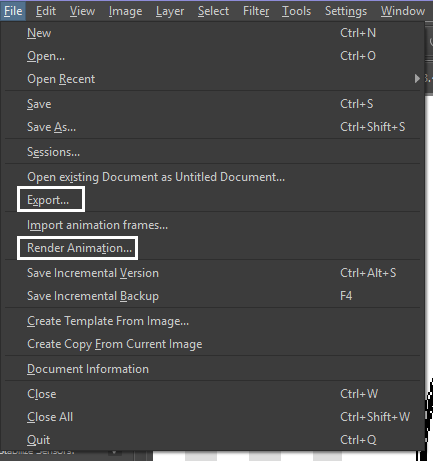
so u got 2 options for exporting ur animation, u can either hit “export,” which lets u save it as different file types, one of which being gif, or you can hit “render,” which gives you gif and video options
well
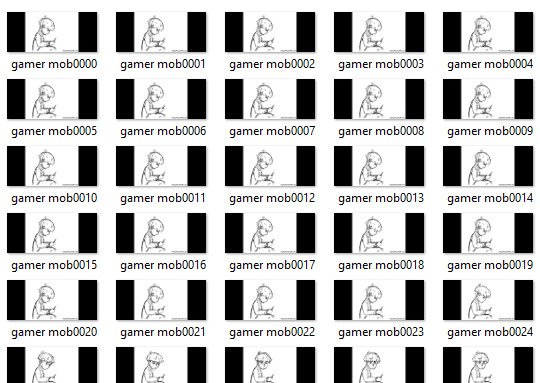
i tried export first, bc that seemed like a good idea, but the “””gif””” it made was distinctly not a gif, despite its claim to be one?? this is what i got:

notice: 1. it is not moving, and 2. the black bars to the sides?? those are supposed to be transparent. they’re transparent in the file i made so why didn’t they register as transparent in the export, when gifs have transparency capabilities??

so That was some real live bullshit but i still had the “render” option, right? export was wrong, so rrender must be the correct option to go to that will produce the results i am wanting to see produced in front of me like a silver dinner platter with a correctly functioning gif under the lid, that’s what i want to see and “Render Animation...” is gonna Give me that silver platter righWRONG ok look at this shit rn ok Look
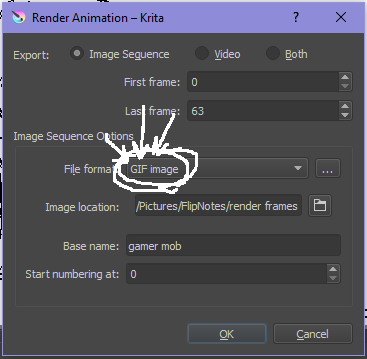
it says GIF it says it RIGHT THERE right??? right?????? then WHY

?????????????
and it also gave me all This bullshit
like did i ask?? did i fucking ask???? i already have all the individual frames why do i need even M o re i mfjgjgk
((rationally ok yea thats v useful for if ur making the animation in krita and want to export the frames to use elsewhere, but like uhhh 1. again, they’re not transparent & 2. i should have the option of saying i don’t want these??? bc *meme voice* i don’t want these)
so in the end i could find NO correct method of exporting animations as a gif in krita bc every ooption that says gif is fuckign LYING to ur face there are NO gifs in krita, aliens made the progam who looked at gifs and went “hmm i thikng this is how a gif works “ and just made jpegs instead but somehow got on the computers good side and got it to lie for them about it being a gif so thats why it says gif on the file still even tho its not a gif illimati confinr
so what is the conclusion to this? well i said there was good news too, and this is the portion where i divulge that sweet nectar (i type dthis 2 seconds ago and @ me what the fuck)
so after wasting a good 2 hours trying to figure out krita i gave up and watched some good old [youtuber name redacted bc what if it shows up in search & ppl see this dumbass post in there but it rhymes with fjackfsepticfeye] to relax into accepting my fate that i’ll never be able to upload my animations to tungle except in poor quality loopless video form, making me into a laughing stock on my own art blog, but THEN i had a stroke of genius, in my Brain
so if u read yesterday’s post u might remember that flipnote studio, the animation program i use on my ds, to animate, has the option to export files as gifs, both animated and sequential (meaning either as one fully animated gif or each individual frame separately), which is super convenient, but as i mentioned yesterday, any time i tried to open the folder with those files on my laptop, it crashed immediately
WELL today i thought “hey, how about instead of opening the folder in the sd card when it’s plugged in, how about i copy that folder from the sd card to my flash drive, and try to open it there, in case it’s the card’s hardware that’s causing the problem, not corrupted files”
so i tried that and it FUCKING WORKED THANK GOD GLORY HALLELUJAH
so now instead of spedning A THOUSAND YEARS trying and failing to force art programs to bend to my will i can just export the animations straight from my ds and drag them onto my computer Just As God Intended oh GOD im so fucking happy
here’s the gif in the end, i’m gonna post it to my art blog too but this is the Green Version bc i animate in green bc of some default settings in flipnote that i got used to, plus it makes me feel like i’m just sketching so nothing really has to be finalized so i’m comfortable while i work, and also it’s just nice ok it’s a Nice Green
(there’s a few frames at the end that are like the extra scraps from while i was working dw i got rid of those in the final version that i’m posting to my art blog later. also i added my blog url to that one too it’s aaaaaall good)
the only downside to this method is that i can’t change the canvas size to be 540px wide to fit with tumbrl s image dimensions but whatever i can just post them in a text post and fix the html to display it at its original size instead of the resizing bullshit tmurbl pulls constantly ugh. anyway it works great on desktop but it’s inevitably gonna look like shit on mobile no matter what i do *Big Ass Shrug*
anyway thats the end of my success story uhh i can’t make the like comment & subscribe joke again bc i already did that in the last post so like bye i guess thanks 4 watchign & have a great day i’ll see u in my next fvideo
https://www.youtube.com/watch?v=YYob4uDjEKI&t=0s
(^that’s my outro music)
#this started out so boring like a tutorial (but made by someone who doesn't know what the fuck theyre talking abt)#& then things derail Real Quick#that's why this is the ''buildup ver.''#retag later#talkin bout stuff#today posts#rieley's wips#(me: i can't mention this youtuber by name in case my post shows up in search#me: *adds a link to the post rendering that effort for naught*#me: *leaves it anyway bc it's funny*)#pls listen to the outro musi c it's rly good & tunmgmldnr wouldnt let me embed the video & idk how to do it thru html & too lazy to look it#up :(
2 notes
·
View notes
Text
What are the best mobile app design tools in 2022?
Below are some of the best mobile app design tools that every designer should know
Following are the best 8 design tools for creating mobile apps in 2022
1. Sketch
The all-in-one tool for mobile app designers works for exporting the assets very fast ultimately. You will have to buy it once, and then you can just go with renewing the license every year. But there is a drawback in the form that you can’t consider editing with it.
The user interface design tool is like Adobe Photoshop and is built mainly for prototyping with the highest wireframing and prototyping space. The download size you will be getting here is 20 MB, and it doesn’t require too many system resources.
However, it turns out to be a great choice for most designers. If you want to edit pictures, you’ll have to come by in this app with other Photoshop or Adobe Illustrator tools.
2. Figma
Figma is a vector graphics editor and prototyping tool that is compatible with Chrome, Firefox, Safari, and Edge. It focuses on user interface design and user experience design, with an emphasis on real-time collaboration among designers. The digital experiences you can get in real-time and in one place make the tool handy. That said, it can work for the turning of the ideas into products faster. The tools have also come up with the condition for getting your work done speedily.
3. Mockplus
Mockplus is a simple and quick prototyping tool for Android/iOS mobile apps with rich and comprehensive mobile application interface design components and icon libraries. You can also upload different designs from Figma, Sketch, PS and more to make it a clickable one, you can also collaborate with your team members and do the handoff work online.
4. Invision
The mobile application design tools ensure you can quickly turn the ideas into the Power full-screen designs. Invision is the platform for inclusive collaboration within digital product design and development. Invision Studio is a new platform for designers, on which you can design, prototype, and animate.
5. Marvel
The must-have tools for the mobile app designers ensure the successful designing of the mobile application. Marvel is a design tool that emphasizes collaboration. It turns simple sketches on paper into interactive, tappable prototypes that allow you to demo your app ideas and share with others.
6.Proto.io
If you are a beginner designer and developer, Proto.io may be the ideal choice for your project, because it is a simple tool that lets you build clickable prototypes with ease for your iOS and Android apps. The original design of this app was for prototyping on mobile devices and has expanded for allowing the users to go with the prototyping of the apps for anything with the screen interface. It comes inclusive of smart TV, digital camera interfaces, and a gaming console.
7.Flinto
Collaborating with your team and everyone else will be better with utilizing this web design tool and the MAC version that can help you easily import the sketch in Photoshop designs and join the team. the prototyping, previewing as well as sharing of the installation link turns out to be simple. Here, you just have to send the precise link to whoever you want to join from the app.
8. Justinmind
The last design tool we introduce to you is Justinmind. It provides a full range of web interactions and mobile gestures so that you can focus on creating delightful user experiences. It can ensure giving you the scope for adding HTML videos, online widgets, interactive maps, and the online or offline version to the application with the help of the widget library. It cannot ensure the integration with the Microsoft TFS and also doors.
1 note
·
View note
Text
Top Flutter App Development Tools
Given that it is open-source and one of the most feature-rich toolkits currently available, Flutter 3 can be utilized "as is" with ease. But if you wish to enhance your Flutter app development even further, then the Flutter development tools mentioned in our list are sure to prove invaluable. So let's get started without further ado.
Codemagic
You can quickly build, test, and deliver applications thanks to CodeMagic. CodeMagic reduces the need for pre-launch configuration by enabling rapid builds, testing, and deployments of mobile applications through seamless and continuous integration. You can use Codemagic and the other technologies on our list to the fullest extent once you employ a Flutter app developer.
Trial Magic
Developers may test and publish both Android and iOS applications with Test for Magic. allowing for easy CI/CD deployment across networked devices CodeMagic and Test Magic are integrated, making it simple to manage provisioning profiles and test devices.
Count.ly
As an open-source product analytics tool that tracks user journeys across platforms and devices, Count.ly is quickly gaining popularity. Development teams may precisely monitor performance and growth by tracking KPI Metrics using Count.ly.
Supernova
Supernova, a relatively new addition to the spectrum of Flutter support tools available, allows developers to import UIs into it and then export them to Flutter to quickly and simply create intuitive, responsive, and extremely appealing applications.
Additionally, Supernova makes it possible for the Flutter app to run synchronously, allowing for the addition of real-time modifications. Additionally, it provides the option to import a Sketch or Adobe XD file and export it to Flutter with any UI adjustments.
Panache
Panache is a material editor that aids developers in creating material themes, customizable shapes, designs, and colors, as well as other themed aspects for your app. It is yet another extremely functional tool to improve your Flutter app development company. Developers may quickly export Panache's assortment of themes and elements as a.dart file and save it directly to your Drive folder.
Sylph
When it comes to open-source command-line tools, Sylph is a well-known brand. On cloud pools, it executes thorough tests for iOS and Android with seamless Flutter 3 code integration. Windows, Mac, Linux, and CI are supported by Sylph.
Appetize
Users can utilize their browsers to run mobile applications in HTML/JavaScript formats thanks to Appetize, a cross-platform solution for developing mobile applications. Appetize is used in a variety of fields, including testing, training, and in-app presentations. Development teams can launch quickly and shorten the time to market by using Appetize.
Adobe XD
At Adobe's Flutter Interact event, Adobe XD was unveiled. Adobe XD offers streamlined workflows for the creation of beautiful mobile app designs. The output from Adobe XD may be easily included in the codebase of your Flutter app by exporting it as an a.dart file.
Firebase
Sharing the same Google roots as Flutter, Firebase is a top Flutter app development platform that simplifies the back-end integration by consolidating its APIs into a single SDK. Firebase provides features like instant messaging and crashes reports in addition to creating and releasing Flutter apps.
Amplitude
Amplitude, which leans more toward product intelligence than development simplicity, enables developers to discover the app's users' usage and interaction patterns. Amplitude can provide comprehensive data and analytics using Flutter, producing valuable business insights.
Screenshots
With the use of the command-line tool screenshots, developers may snap and share screenshots directly from the stats bar. The currently under development Flutter app can then incorporate these screenshots in more detail.
A Conclusion
As one of the all-time most popular software development toolkits, Flutter currently rules the roost. You can now take your development venture to the next level with a Flutter app development firm thanks to the fast popularity of Flutter by mobile development company worldwide and the abundance of Flutter app development tools available on the market (a major percentage of them open-source).
Our professionals are primed and prepared to be deployed to your Flutter app development project.
0 notes
Text
A Complete Guide to Design Website Mockup
Website mockups help to provide a clear insight into the look and feel of the website. A website mockup demonstrates what the final product looks like.
What is a Website Mockup & Why to Create it?
Website mockups are a static visual representation of the final form of web pages, applications, and websites. A website mockup demonstrates what the final product looks like. Generally, including a site’s basic features such as the main layouts, page elements, branding, colors, fonts, and graphical content, website mockups are sketches or prototypes designed to simulate the final website for product managers, developers, designers, clients, and other stakeholders.
How To Choose the Best Tool for Designing Website Mockups?
You can choose the right tool for refining and improving your design with the following features that set a good wireframe tool apart from the rest.
UI Component Library
Mockup Fidelity Levels
Options For Collaboration And Feedback
Hand-off And Export Features
Most developers require only a screenshot to start working. All well-developed mock designer tools come with hand-off features that allow you to export the individual elements of your design, such as icons or whole screens, into HTML and also inspect the design to understand the CSS code for implementing a quicker development.
Designing a Website Mockup Step By Step
After understanding the concept of a website mockup and learning the various tools required to create a website mockup, you can move forward with the various steps to create one.
Gathering Information
Focus On The Elements
Go Forward With Interaction
Emphasize On User Testing
Proceed With Development
Summing It Up
Creating and designing website mockups is a brilliant strategy if you’re looking to cut costs and introduce your product to the market faster with guaranteed usability. Moreover, mockups tend to bring your team together and boost good collaboration between design and development teams, which positively impacts the quality of the end product.
MockFrame by 500 apps is a wireframe software used to create stunning prototypes such as website mockups and diagrams. Loaded with prominent features, it allows for project management, image libraries, design management, UX, and UI prototyping.
0 notes
Text
Must have tools for UI/UX designers
Must have tools for UI/UX designers
There are a number of tools available for businesses to produce digital products. They range from design tools to development tools and web creation tools. Prototyping tools help businesses to upgrade the workflow making product creation faster and effective. Nowadays, clients look for interactive prototypes that give an overview of the designs and interactions. Prototyping/wireframing is a key step in the web and mobile app development process. There are a number of tools for UI/UX and finding the right one to create apps/websites with high productivity can be overwhelming. Here is a list of some of the most popular tools for UI/UX design and development:
Read More Blogs:
cost to develop an on-demand delivery app like Doordash
Webflow: Launched in 2013, Webflow allows designers to create websites quickly. Although this tool’s interface is similar to Photoshop, a bit of knowledge in coding is required to change the site’s html/css tags based on the client’s needs. Designers can find full integration with Google fonts, high-quality cms, access to code, storage options and complete export of the design code. Webflow is a great option to create simple static sites only. It is available for both Mac and Windows users.
Flinto: Flinto enables designers to create interactive prototypes for mobile, desktop and other web applications. With this tool, designers can create complex interactions on top of layers imported from Sketch. Flinto is available for both Mac and Windows users.
Framer: Framer requires knowledge of coding with coffeescript and offers an unlimited number of options for the user. Although Framer has its own design tool, it also integrates perfectly with Sketch. Using live data, users can do everything possible on the web. Framer is available for Mac users only and offers a free trial period.
RapidUI: This new tool allows users to transform Photoshop files into live sites without the need for coding. Users can easily drag and drop PSD files into the dashboard to perform this operation. There is full accessibility to the code that is synchronized with the design, enabling collaboration with programmers. Currently in Beta, this tool is free to use and available for both Mac and Windows users.
Hype 3: This tool enables users to create animations and is similar to working with Adobe’s After Effects. Hype 3 records animations and automatically exports them to HTML5. It does not require any coding knowledge and works on a number of devices like mobile, desktops and tablets. Hype 3 is currently available for Mac users only.
Invision: Invision seamlessly integrates with Sketch and allows designers to design, review, test and share the results with a mobile app development company in Bangalore. This tool offers project collaboration features that allow users to give feedback, take notes and view the product changes in real time. It also enables users to build prototypes for mobile as well. It is free to use for one project and is available for both Mac and Windows users.
Read More Blogs:
cost to develop food delivery app like UberEATS
Axure RP: It is one of the most popular UX design tools among users. It can be used to make click-through wireframes, user flows and sitemaps as well as interactive prototypes. Users can also add interactions and use ready-made elements from widget libraries. Users with basic knowledge of programming can use this tool to build more sophisticated and interactive prototypes.
For all your UI/UX needs, send your queries to [email protected].
0 notes
Text
How To Create Your Own Free SVG Icons
Free SVG icons are a powerful and smart means of communicating your ideas across audiences. Knowing that it would simply up the effect of your creation, these magic shapes are just so hard to overlook. Graphic designers are often found to experiment with an array of methods for using icons on their websites, applications, and other digital content.

What’s Better- Icon Fonts Or Free Svg Icons?
Although icon fonts are highly customizable with its standard CSS (Cascading Style Sheets) styling rules over image icons, their designing is quite limited to monochromatic colors, size, standard transforms, and animations, They can also turn out to be glitchy, leading to the generation of multiple server requests. Additionally, your browser’s expected failure to identify the icon font can show up a blank space instead of fonts themselves.
Now that you have a good chunk of reasons to use SVG icons, let us understand how to create your own free SVG icons. Here is much that you need to know for creating free SVG icons.
Drawing Icons
The first step to creating your own free SVG icon is to sketch them out. Draw each design on a distinct artboard and save each of them in a separate file. Now, open the vector design program of your choice. A vector image program entails drawing icons with the help of different colors, shapes, and path administration on a virtual drawing board. Following this, you export the .svg file, and the coding will take place behind the scene.
Understand The Artboards
The artboard size won’t be a matter of concern if it’s a single icon. You will just need to ensure that it has a decent size, meaning neither too large nor too small. However, if you are seeking to create a uniform icon set, your artboards should be of the same size.
Draw Over A Grid
Consider drawing the icons over a grid so they turn out as symmetrical as possible. Also, use a square Artboard and customizable stroke size for maximum efficiency. If you are creating a mono-colored icon, it would be best to set your design tool to solid black. Do not worry, as it can be easily changed in the application or the stylesheet to your desired color.
Keep Shapes Simple
While creating free SVG icons, make sure that the vector shapes are simple. It will bring out a simpler SVG code that loads in the blink of an eye and is least susceptible to show-up errors. Cut out the unnecessary points. For instance, a circle must need not more than four-vector points. Anything more than that can easily invite technical fuss.
Layer Them Right
Consolidate shapes and layer them over one another to generate versatile imagery. Transform any grouped layers, circles, or ellipses to aggravate paths. This will assist you in creating free SVG icons with small file sizes and make sure that their quality remains intact across different channels.
Add ID Tags
If your icons are ready, you are good to export and optimize them in SVG format. Once done, open the files in a code editor and assign a distinct ID tag to each SVG tag.
Using The ‘<img>’ Tag
One of the most common ways of using the SVG file icons in your design is by using the <img> tag. For example, <img src=”alert.SVG” alt=”Alert” width= “125”>. It allows you to customize the size of the image. However, one significant drawback is that you cannot do a thing about the color.
Enhancing The ‘<img>’ Tag
You can enhance the img tag with the help of fragment identifiers. These are embedded SVG properties. You can refer to an SVG component with the help of an SVG view specification. For example, <img src=”svg_file.svg#svgView(viewBox(a,b,w,h))”>
How To Insert Free Svg Icon Files
SVG images are a piece of cake to integrate into your web design. You may choose to either upload icons, the SVG code, or the SVG editor can be used to create a new SVG icon. For encoding an SVG with the help of a <img> component, you simply need to link it in the src attribute. You will also require a height or a width attribute, or both in certain cases to achieve an effective integration.
Editing Free Svg Icons
A modifiable SVG refers to the use of SVGs in HTML documents with their code embedded directly in the document rather than importing them from a file. These are created by employing tags such as <svg> </svg>.
0 notes
Photo

How to Export Sketch to HTML ☞ https://medium.com/sketch-app-sources/how-to-export-sketch-to-html-65c427b3aa3a #html #css
1 note
·
View note